
Following is a post from the blog of scrapper-extraordinaire Emilie Ahern click here She is not only a great scrapper, but a fabulous and talented writer, cute mama, and all-around wonderful person. I discovered all this just by reading her blog. (She always has fun music on her blog too.)
Since I love quotes, words, sentences, stories, proverbs, commas, parentheses and all things written, I love her simple project for making and embellishing a frame with a favorite quote. I am so going to make myself one of these - I've got enough supplies in my scrapping stash to make 100 and start a shop on Etsy. But I can't get distracted...
Now my only problem, and this is always my problem, is what quote to use. It's going to take me awhile to decide, but when I do I'll let you know. If you want to add to my frustration, or joy, really, tell me your favorite quote.
I might use a quote from a Kobi Yamada book. Thanks Emilie! (I just can't help this scraplifting habit.) Here's Emilie's post:
Happy NATIONAL SCRAPBOOKING DAY & a PRIZEWoo Hoo!
In honor of this fabulous day I am going to give you an idea for a fun little project that can be finished in no time. And there's a PRIZE!
The project: Making a desktop "Happy Place". A small inexpensive acrylic frame embellished in some way so that when you look at it you feel happy. This can include a mantra, your favorite quote or pictures of your loved ones. Here's mine with my goal for this year...EAT healthy PRAY more LOVE completely.

Here's all you need:
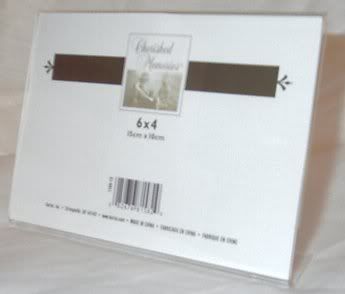
- Acrylic frame, available at all Dollar Stores.
- Scraps of scrapbooking supplies.
- Pictures (if desired)
Instructions: Simply take the white paper from the frame. Most of these state the dimensions of the frame right on them. You can use any size you want. This one is a 4x6", but mine above is a bit more small than that, measuring just 3x5".
Cut paper to those dimensions and start building a mini scrapbook page.
To add dimension, you can also adhere rub-ons, cut paper or stickers to the outside fromt of the frame. I did this by cutting some extra petals from the flower I used and using gluedots to adhere them to the front, lining them up perfectly with the existing flower.


Voila! Isn't it cute? I just love mine and it really brightens up my drudgery old computer space. I hope you are inspired to create your own HAPPY PLACE for your desktop.